Tuesday, March 31, 2009

You're fired!


Looking to make a bold statement? Try the power color called red.

This look requires a lot of confidence. It's definitely for the risk takers. Red shadow will show everyone your unconventional side.


Get Dolled Up in 4 steps:

1. As usual, I used a bit of red cream base on the entire lid and crease before...

2. ...patting the powder eye shadow on top of the cream color. Red is a strong color and a little bit goes a long way, so use it sparingly. Gradually build the color to how you like it. The one I used here is listed below and has a delicate red and gold shimmer in it.

3. Some matte purple shadow on the outside corners adds a hint of smokiness without being too dark, because the priority here is the pop of red not the smoke. Blend the colors out so that they peek out at your crease while your eyes are open.

4. A heavy stroke of black liner on your upper lash line is the secret to pulling off a red shadow look. You will see a dramatic difference once your eyes are lined!


Keep the rest of your face neutral (maybe just a touch of bronzer if you really must) and finish it off with clear gloss.

You'll have people wishing they could have the confidence you have for hot fiery eyes!


*Recommended products:


FACE Stockholm Eye Dust in "Ego"
FACE Stockholm Matte Eye Shadow in "Dynamic"
Make Up For Ever Flash Color in "Red 17"

Tuesday, March 24, 2009

Simply Orange


Spring is here!

Orange is THE perfect color for spring time lips. I guarantee that spring collections everywhere have an orange lip color in their line up. It's flattering when you wear it sheer or even in a deep brownish-orange. You will get tons of compliments on this one. Everyone always stops to ask me about what I'm wearing when I do this look.

This is just orange lip stain with a clear sparkly gloss over top. So simple!

I love felt tipped lip stain pens/markers because they are so easy to use. They go on quickly and precisely and are soooo long lasting. Just make sure your lips are completely dry before applying. This will allow your skin to absorb the stain properly. if you need a lip conditioner, apply it after the stain. Since it's a stain, it will allow the color of your natural lip color to come through, so don't think the color will be too orangey. Trust me, you'll wonder why you haven't tried it sooner!

Just try it at least once and remember it's just makeup!


*3 markers to try:
1. Sephora Lip Marker in "Apricot" (soft orange) (FYI:--This one might have been discontinued),
2. Stila Lip Rouge in "Baci" (a peachy brown), or
3. CoverGirl Outlast Lipstain in "Coy Coral" (coral brown)

Monday, March 23, 2009

Maroon in 5...4...3...2...1...


While crazy posing on the subway platform (or your house, a club, etc. I had actually just gone to see an off-Broadway musical called "Kingdom")...

...why not try a shimmery Maroon eyeshadow?
It's a totally unexpected color that's more wearable than you'd think. Using a cream base in a similar color first, I applied the shadow over my entire lid almost all the way to the brow. Use whatever is left on your brush and bring the color through the bottom lashes making sure to connect the color at the corners so you have a nice shape of color surrounding your eyes.

Add black eye liner to your lash lines and your rims to finish your smokey eyes.

Keep the rest of your makeup neutral for a modern look. I just used a little bronzer and a nude lip color.


*product to try: M.A.C. Pigment in "Maroon"

Thursday, October 23, 2008

Robin Thicke + Mary J. Blige = AMAZING


WOW. Robin Thicke opening for Mary J. at Radio City and getting bumped up from the nose bleeds directly to orchestra seats upon arrival and for free?? OH DIP. That's all I have to say. This one really made up for the Kanye concert.

I'm throwing in Photoshop filter effects just because I felt like it. Any time I play with an image, I'll always include the "real" pic, ok? So, don't freak out. I love looking through a magazine and seeing illustrated or rendered makeup and fashion imagery. It's creative inspiration. But, I admit, it's always hard to tell what the real pic looked like before all the digital play. Very frustrating, right??

So, for this concert, I wanted something sophisticated with a hint of glam. I mean, come on...it's Robin and Mary. DUH. I kept my skin very simple with bronzer. Then, did my eyes with a cream eye shadow in bronze as a base, and on top, I applied a shimmery, dark bronze powder eye shadow that has a green iridescent highlight in it. The shimmer from the shadow is what's going to give you a little glam. When it catches the light, it will shine a soft shade of forest green. Lovely! Everything was applied to the lid and blended into the crease. Don't forget lots of mascara, some clear lip gloss, and you're done!

Some products to try for this look:
for the base: M.A.C. Shadestick in Gentle Lentil
and for the shadow: M.A.C. Pigment in Blue Brown.


For more on the conert check my other blog via my links: Chit Talk

Tuesday, August 26, 2008

Kanye's Glow in the Dark concert was crappola.


At least I did my makeup cool.

I kept my makeup to a minimum because we were going to be in dark lighting conditions. I didn't want to spend time on makeup that would get lost in the shadows. So, I went for glittery liner that could catch the light. The result is big impact with minimal product!

This look will give you a small dose of strong color and with a glittery texture.


It takes 2 steps and less than 2 minutes to Get Dolled Up:

1. Use a solid colored liner (here I used green*) to line the upper lash line. Use whatever kind you like: pencil, creme, gel, powder, etc.

2. On top of the liner you just applied, apply a liquid glitter eye liner in the same (or similar) color*. Add as much glitter liner as you like. The more glitter you apply, you'll get a brighter the color and a more metallic result.

Layering the 2 different liners this way will give you a bold color payoff.
You don't have to use green, you can use any color you like! As long as you use matching colors for steps 1 and 2, then you will achieve the similar results.


please note:

*For Step 1, try M.A.C. Cosmetics Kohl eye liner in "Minted".


For Step 2, try Urban Decay's Heavy Metal Glitter eye liner in "Stage Dive".


for more thoughts on the concert see my other blog via my links: Chit Talk

-------------------------------------------
images and makeup by A1
please do not reproduce or distribute any images from this blog without permission.

Friday, August 1, 2008

I Heart Nail Polish...

...that I certainly do! Here I used FACE Stockholm Nail Enamel in "56" which is one of the brightest pinks I've ever come across. LOVE it. To keep things simple but exciting, add some sparkle with prismatic star shaped nail glitter from Dashing Diva only on the thumbs*. Then, top them all off with a coat of clear polish**, give them some dry time, and you are set.


P.S. I hate when my nails get a ding in them when I think they're finished drying. After drying, I like to use one of those quick dry nail oils just as a precaution. Any should do. The oil brushes on like a polish and allows the nail to glide over things you accidentally bump them into preventing all those annoying dents in freshly painted polish. I use Wet 'n Wild "Flash Dry Nail Set". It's so cheap and does the job. If you can't find one at your store, baby oil should do fine in a pinch.

* I only applied glitter to thumbs for impact minus the ghetto fab. I love me some ghetto fab, but that wasn't the look I was going for this time. I wanted a clean, eye popping set with a hint of sparkle. But hey, if that's the look you prefer then do it! Glitter those nails to your heart's content. It'll definitely look dope.

** A clear coat I heart is Sally Hansen "Insta-Dri Anti-Chip Top Coat". 1 coat will do you, and they'll be dry to the touch in 30 seconds. That's freaking fast.

-------------------------------------------
photograph and makeup by A1
please do not reproduce or distribute any images from this blog without permission.

Wednesday, July 30, 2008

Tee : Look 1


For this look, I focused on cheeks. I wanted a fun alternative to the every day single color blush. 3 colors were applied side by side from the apple of the cheek to the hairline to create a fresh take for those who love the look of blush.

Big Ups to my girl, Tee, for modeling for me!


You can achieve the feel of this look in just 2 steps.
Enjoy!
---A1


Here are your instructions and details to Get Dolled Up:

1. Begin by taking a bright, cream shadow or blush* (see footnotes) and apply a thin, sheer layer of color in small circles with your finger, sponge, or a flat synthetic brush (synthetic brushes apply creams better than fluffy brushes). Make 3 circles of color so that they form a row from the apple of the cheek to the hair line in the same place where you would normally apply your blush. Make sure to apply the cream so that it is a really thin veil of color. You should still be able to see the texture and color of your skin underneath. Blend the edges and make sure the colors blend softly into each other. You should not see hard separations between the colors or with the skin. They should blend gently from one color into the next.


2. The next step is to apply the powder colors (eye shadow or blush) on top of the cream base you've just applied. Use very bright and vivid colors**. Use a medium sized fluffy shadow brush and just barely touch the shadows with the tip of the brush. You should pick up only a tiny amount of powder. Lightly tap the powder onto the area of corresponding cream color and gently blend the color onto the skin using a light tapping motion. Repeat this for the remaining 2 powder colors making sure to blend the colors softly into each other. When applying the powders, remember to keep a soft shape of each "circle" of color.

Bonus:
If you want to complete this look, apply a very sheer wash of gold eyeshadow to the inner half of the eyelid and finish it off with a nude lip gloss. Apply any color used on the lid and lips very sheer in order to keep the color focus on the cheeks.

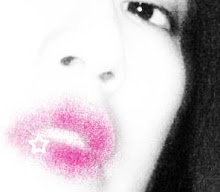
Tips: To keep this look even more modern, I applied the 3 colors asymmetrically (only on 1 side of the face). I chose to apply them on this side of Tee's face since her hair falls to the other side. On the other cheek that you can't see in this picture, I lightly applied just the pink cream and powder color to the apple of her cheek to balance the look. The key to producing this look is to apply sheer and soft, yet still vivid color.

please note: Sometimes, certain products can only be used on certain parts of the body due to ingredients that should not be ingested or should not be placed in the eye or lip area. Be sure to use products on areas on the body that the manufacturer deems safe.


*Use 3 different shades of cream color in hues similar to the powder you are going to apply on top of it. This will allow the powder to stick nicely to the skin and have a strong color payoff. This method of applying color will allow your makeup to look fresh and will eliminate the need to touch up color that looks worn off throughout the day. Using a cream color as a base is key to a look with strong color results. This will allow you to use less product so the skin still looks natural.
Cream colors used: MAC PRO cosmetics cream color bases in yellow (Yellow Scream), orange (Orange Alarm), and pink (Pink Shock). Makeup Forever also sells great cream colors that they call "Flash Color".


** Don't worry about the colors being strong in the container since you will apply them light and sheer. You can always dip back into your powder to build up the color to your liking.
Powders I used: MAC PRO pigment in yellow (Yellow) and FACE Stockholm shadows in bright neon orange (Alarming) and a bright neon pink (Shocking). Feel free to use loose or compact powders.


photograph and makeup by A1
please do not reproduce or distribute any images from this blog without permission.